You can add to and manage your client's performance media. This includes any reels, video clips, and audio clips you want to make available to Casting when submitting your clients.
Managing Existing Performance Media
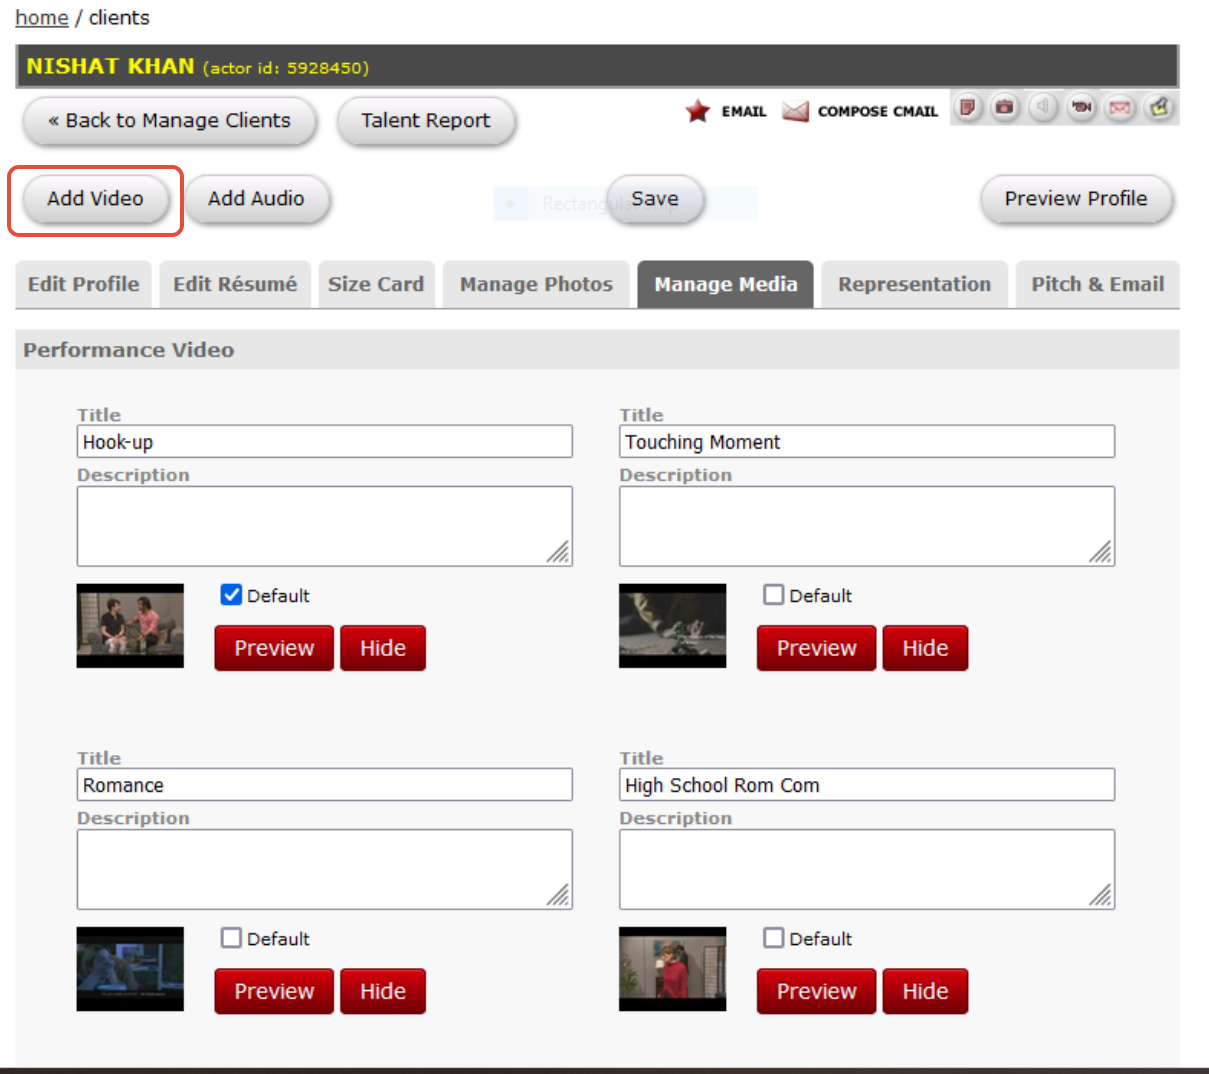
1) To get started, go to Clients, then Manage Clients, on your home page.
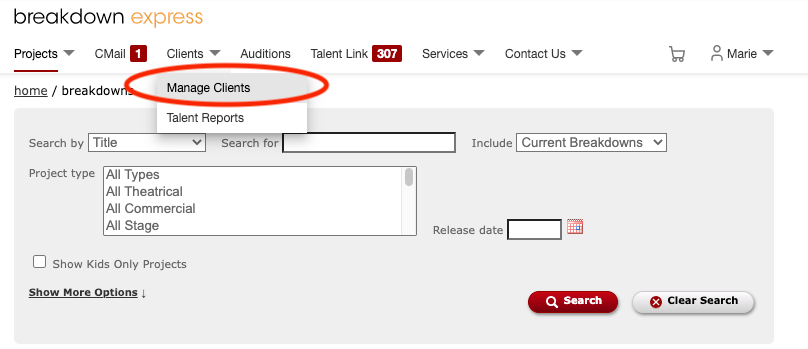
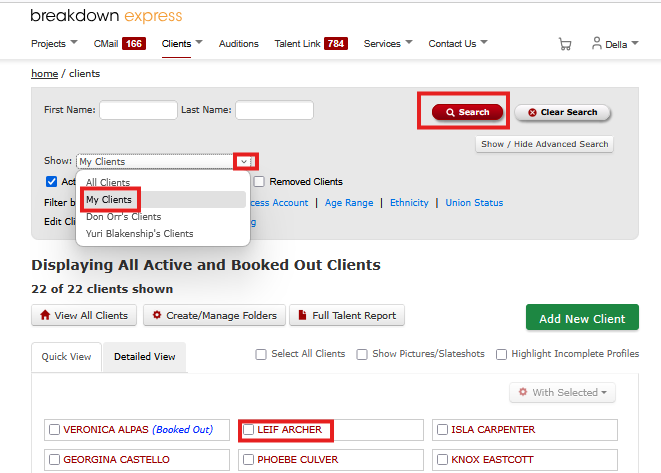
2) Select the client whose performance media you want to manage by clicking on their name.
Note: If your Staff Permissions enable you to view and manage the rosters of other members of your Agency, you will be able to do so by selecting from the dropdown menu that will Show which roster is currently being displayed, and then clicking Search.
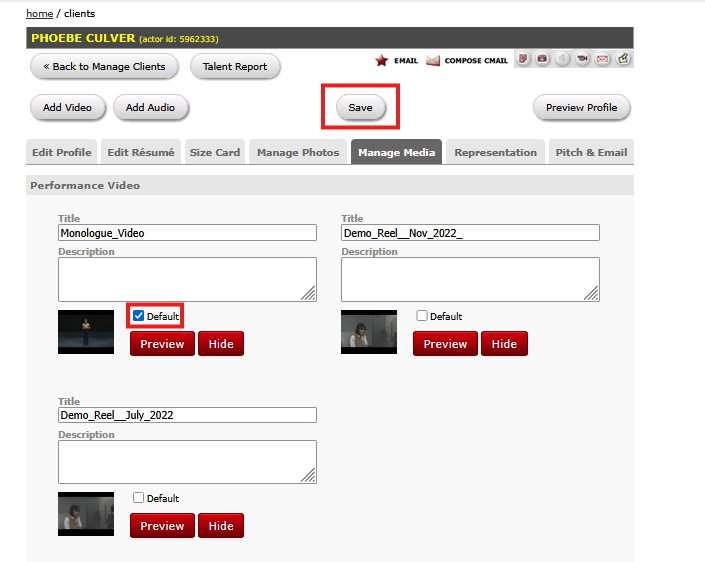
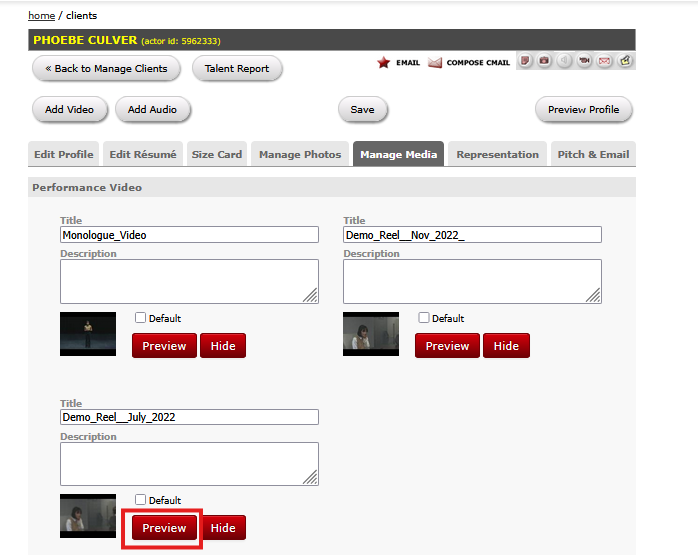
3) To manage and view your client's media, go to the Manage Media tab.
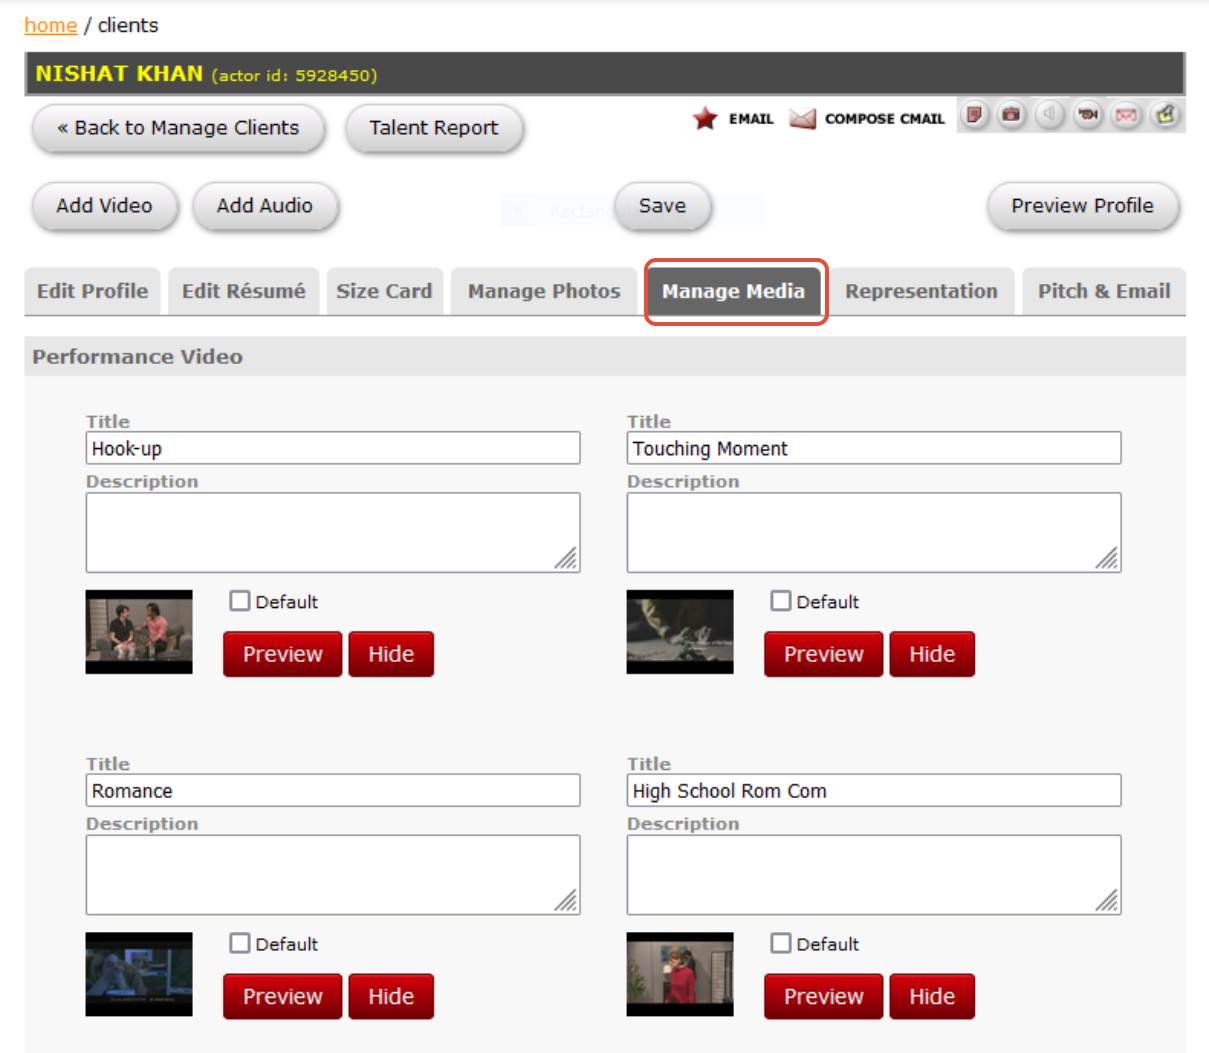
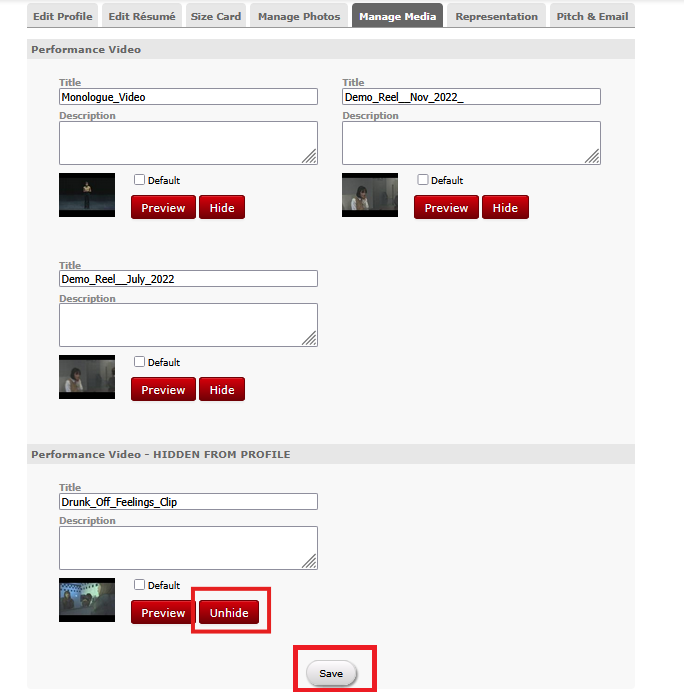
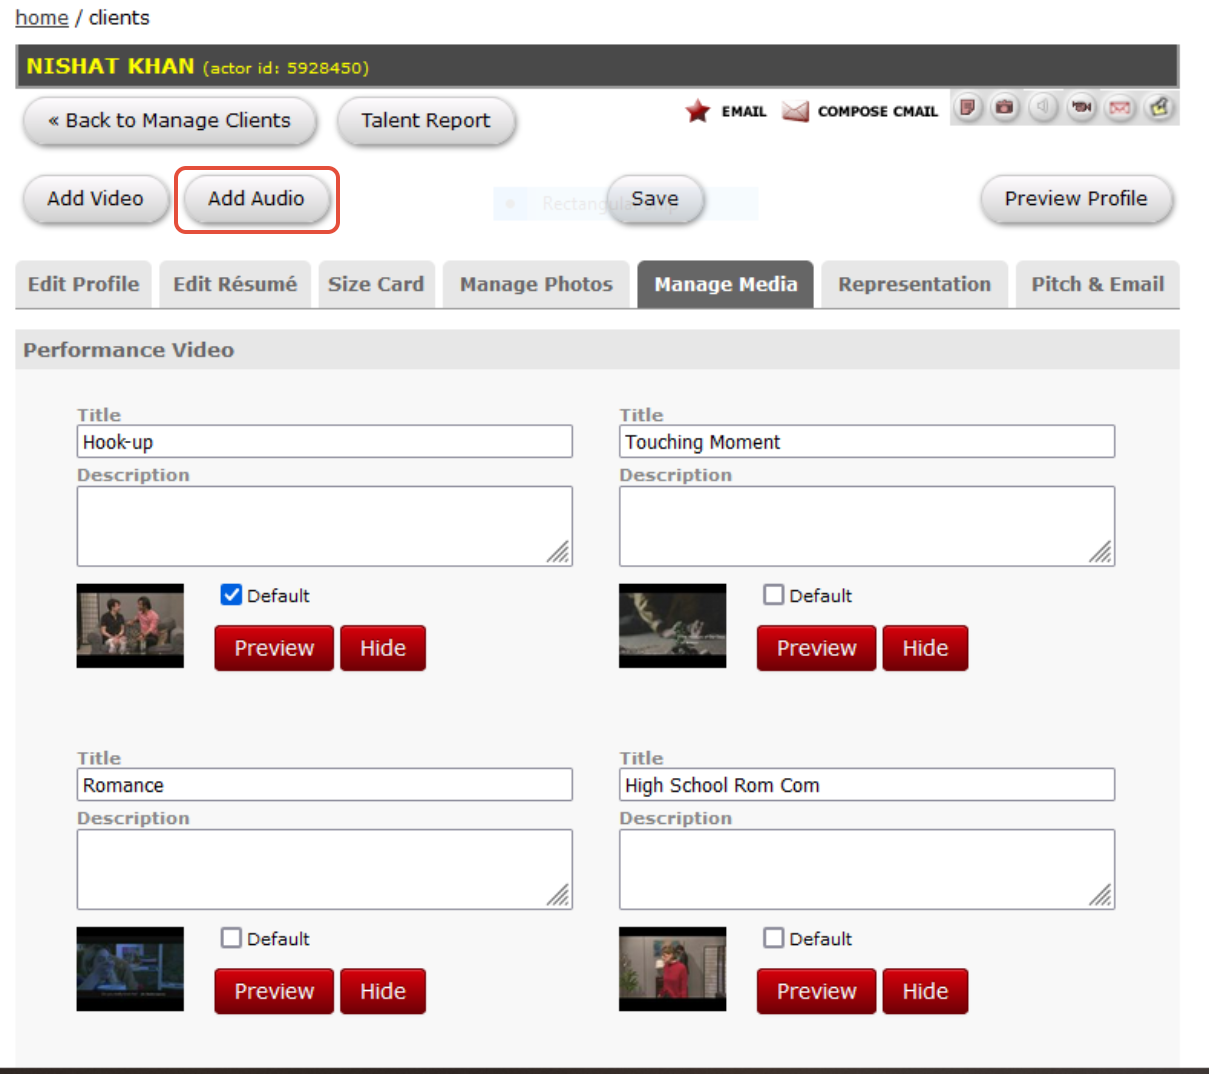
4) In this tab, you can preview performance media you have already uploaded, and choose which media you'd like to select as your default for submissions. You can also preview, remove, and edit titles and descriptions.
5) If you wish to select a clip as a default clip for your submissions to Casting, check the Default box next to the thumbnail of the clip. Then click Save at the top of the page to lock in your changes.
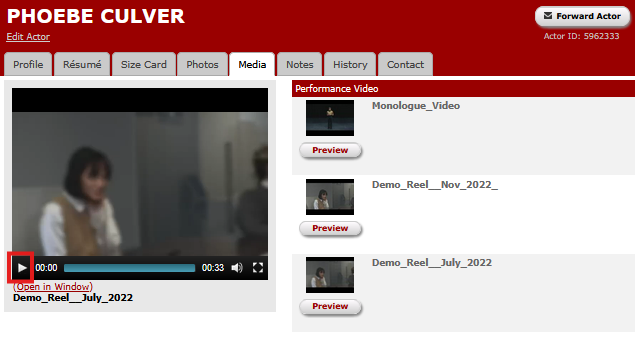
6) To view a Performance Video or Audio file, click Preview next to the thumbnail image.
A preview window will open. Click the play arrow to start the clip.
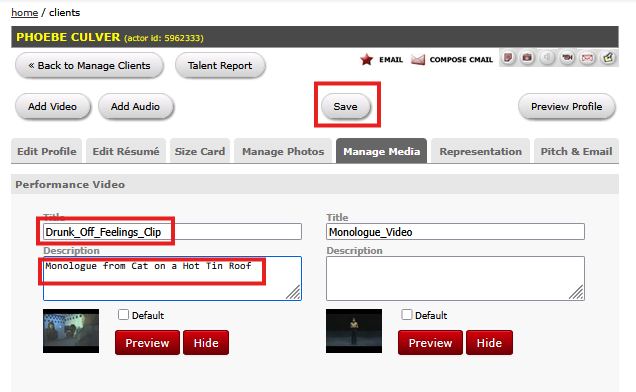
7) If you wish to edit the Title or Description of a clip, type your changes into those fields. Then click Save at the top of the page to lock in your changes.
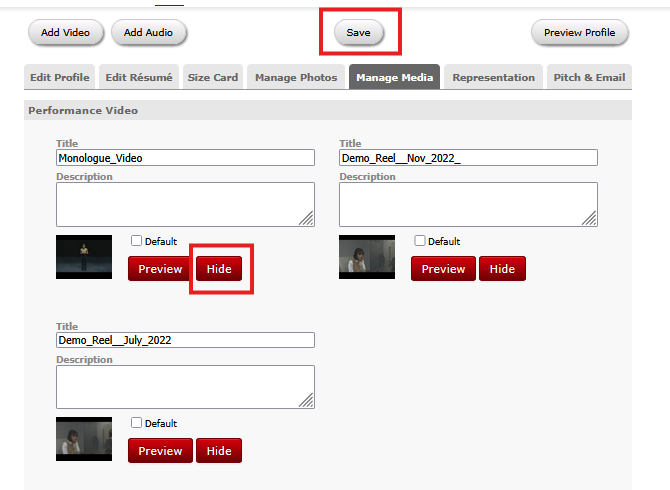
8) If you wish to hide a clip, click Hide next to the thumbnail image. Then click Save at the top of the page to lock in your changes. The clip will no longer be visible to Casting Directors on the Actor’s profile.
9) To restore a hidden clip, scroll down to the Performance Video - HIDDEN FROM PROFILE section and click Unhide next to the thumbnail image. Then click Save at the top of the page to lock in your changes. The clip will once again be visible to Casting Directors on the Actor’s profile.
Uploading New Video Clips
1) To add a video, click the Add Video button located at the top left hand corner of the page.
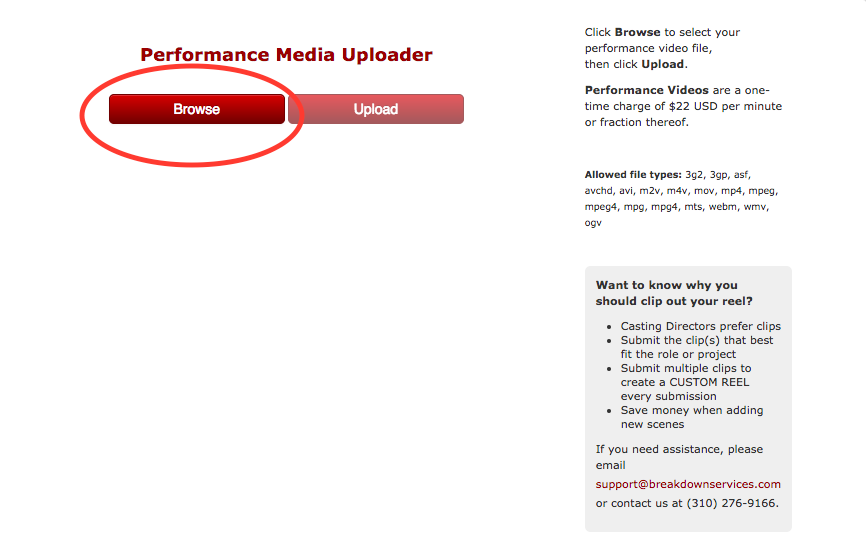
2) You will then be brought to the Performance Media Uploader screen. Click Browse to search for your video file. Once you've found it, click the Upload button to upload and encode your video.
Note: Performance videos are a one-time charge of $22 USD per minute or fraction thereof.
Note: The acceptable file types are 3g2, 3gp, asf, avchd, avi, m2v, mov, mp4, mpeg, mpeg4, mpg, mpg4, mts, webm, wmv, and ogv.
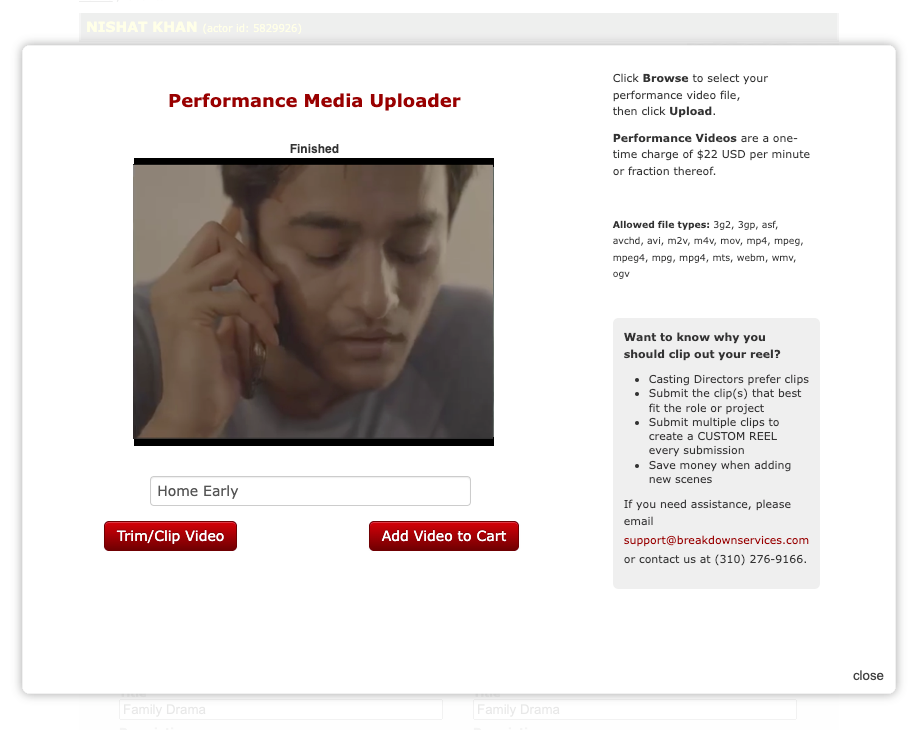
3) After you've uploaded your file, give the video a title of your choosing, you can then choose either Trim/Clip Video, or Add Video to Cart to add it as-is to your cart for checkout (jump to step #8).
4) Click the Trim/Clip Video button to edit the video file. This will allow you to create clips from selected portions of your video, trim it down, or choose different start and end points.
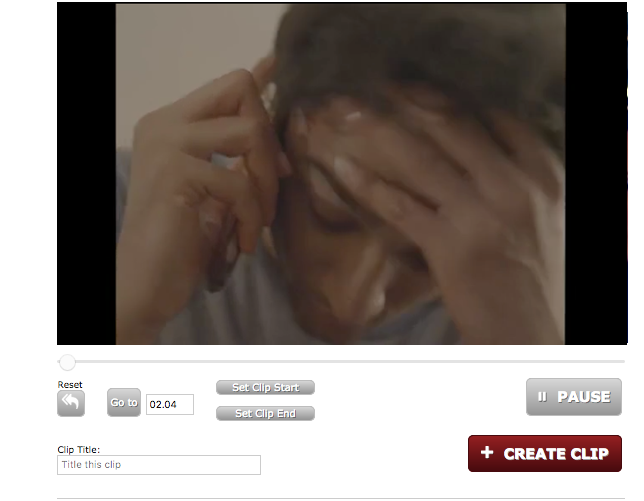
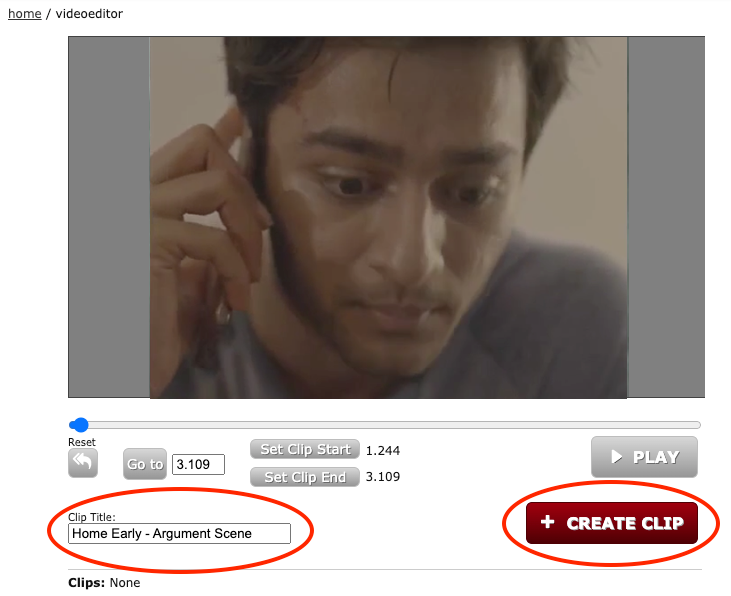
5) Let's start by creating a clip from the video. You can adjust start and end times however you may like, and title the clip.
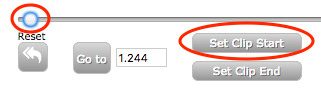
To set the new clip's starting point, drag the playhead to the frame you want to begin at. Click Set Clip Start when you're done.
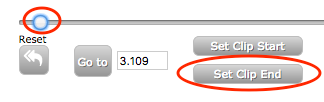
To set a clip's end point, drag the playhead to the frame you want to end at. Click Set Clip End to save your end point.
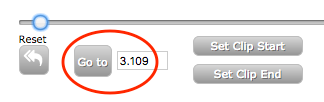
You now have your start and end points for your new clip. If you want to go to a specific frame, enter the number of the frame that you want to jump to and click Go to. This will jump to a new point in the clip.
If you wish to undo all your actions, click the Reset arrow button. This will take you back to the beginning of the clip, and erase your start and end points.
To create the clip and preview what you've made, click Create Clip. You can then add a title to it under Clip Title.
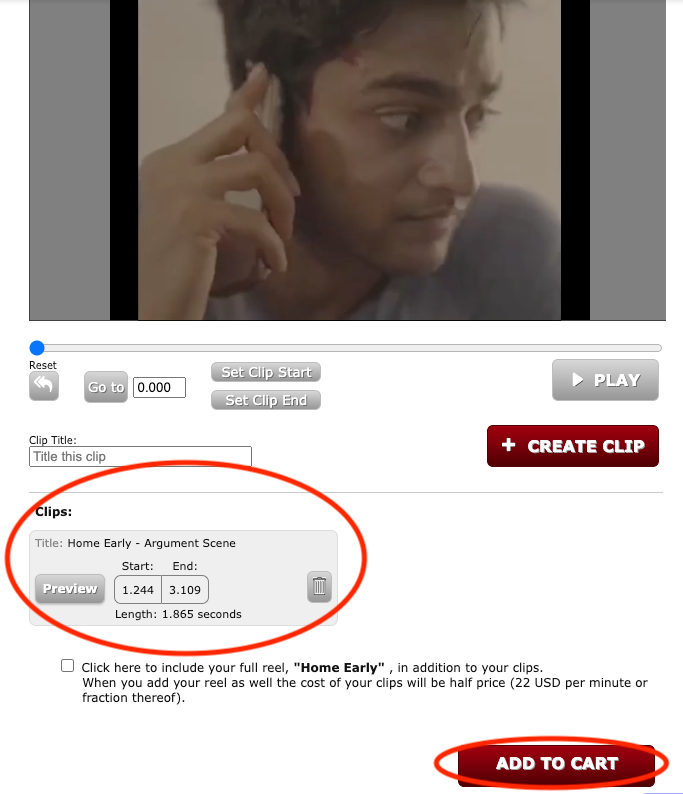
6) Repeat to create as many clips as you would like. Use this process to break an edited reel into individual scenes, or to trim your clip to a shorter length.
Note: When submitting to Breakdown, you can include multiple clips to create a custom reel for every submission.
7) After creating your new clips, you can play them back to see how it will look by clicking Preview. You can also click the check-mark box below to include the full reel in addition to your newly created clips as well. When you add your reel with the clips, the cost of your clips will be reduced to half price ($11 USD per minute or fraction thereof). Once you're done, click Add to Cart to proceed to your cart.
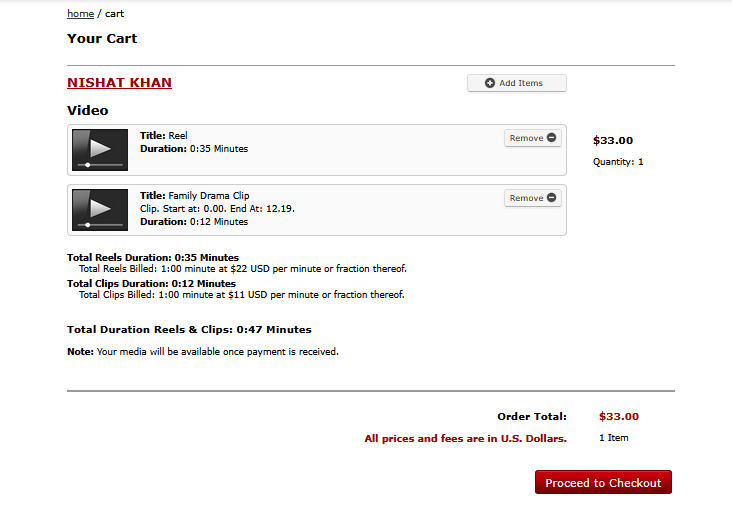
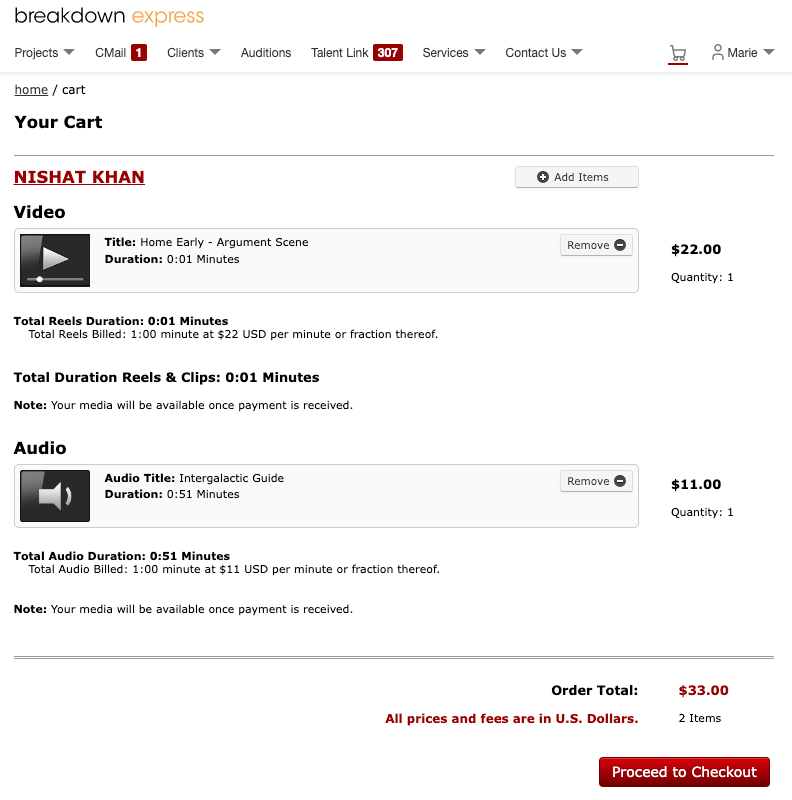
8) In your cart you'll see the new clip added, along with the total price. You can preview the clip again, or add more clips to your cart before you checkout. Once you're ready to purchase, click Proceed to Checkout and follow the steps from there.
Uploading New Audio Clips
1) To add Audio files to your client's profile, in the Manage Clients menu, click Add Audio.
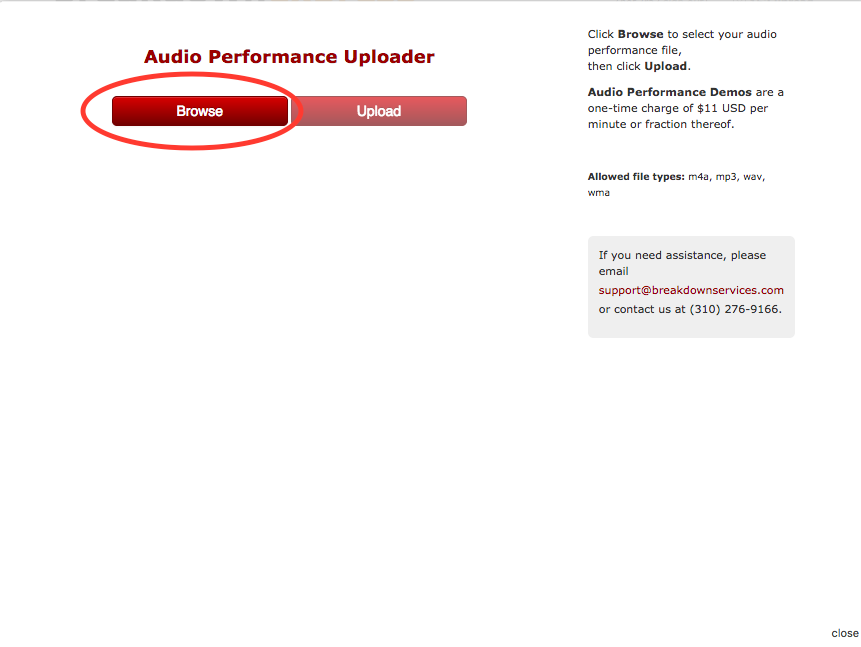
2) You will be brought to the Audio Performance Uploader. Click Browse to search for your audio clip, then Upload to upload the selected file.
Note: Audio Performance Demos are a one-time charge of $11 USD per minute or fraction thereof. The only file types you can upload are m4a, mp3, wav, and wma.
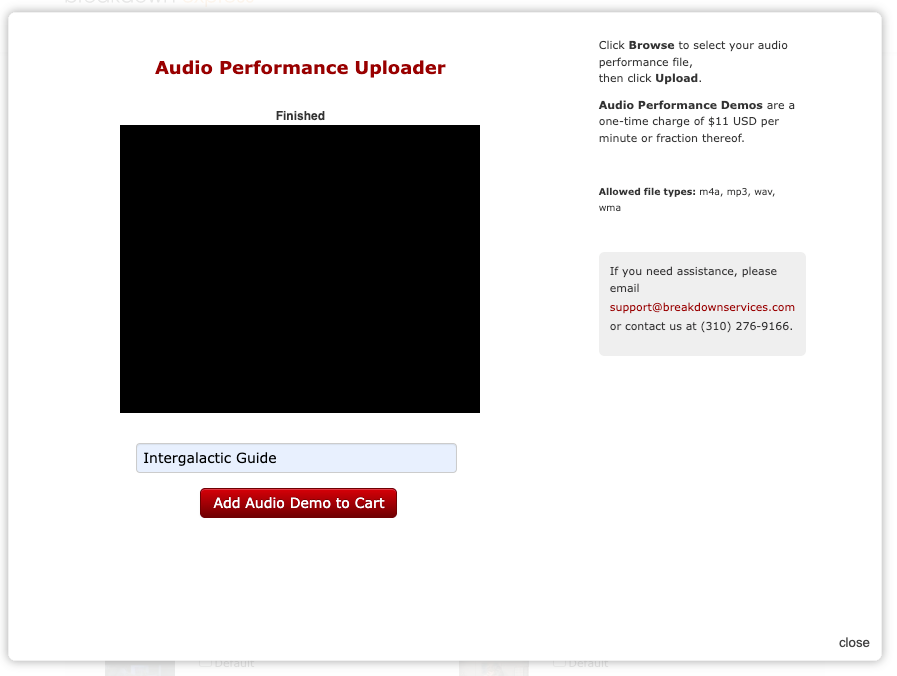
3) After the file is finished uploading, name the audio clip, then click Add Audio Demo to Cart.
4) In your cart you'll see the new clip added, along with the total price. You can preview the clip again, or add more clips to your cart before you checkout. Once you're ready to purchase, click Proceed to Checkout and follow the steps from there.
Note: Actors can also upload their performance media via their Actors Access account. Instructions for your clients here.
Next Steps: